

We all have our field terms when it comes to NDT. I’ve seen plenty of field reports that industry-types could understand but you'd never submit them to the client without a thorough wash and rinse through the grammar cycle.
Goop. Cuppy. Indie. We all have our field terms when it comes to NDT. This is the colloquial banter we use when we’re talking shop with our teammates (except for the word “colloquial”, unless you want to eat lunch alone). I’ve seen plenty of field reports that industry-types could understand but you'd never submit them to the client without a thorough wash and rinse through the grammar cycle. Let’s talk about that.
The Flowchart-y Part
Flowcharts are neat but sometimes they’re too complicated. I’ll try to make this one as simple as I can. Ultrasonic testing will be used in the examples (of course) but you can apply this across all NDT methods.
The four major terms are highlighted in colour and you'll notice only "Indication" is on the right side under the banner of "On Screen". Discontinuities, flaws and defects are actual physical things in the part (left side), and indications are on your screen (right side). I've heard plenty of folks (myself included) refer to the amplitude of the flaw, or the length of the indication. That's unpossible!
The definitions below are extracted from ASTM E1316 – Standard Terminology for Nondestructive Examinations. There are other sources that may vary slightly, but we'll stick with ASTM for now.
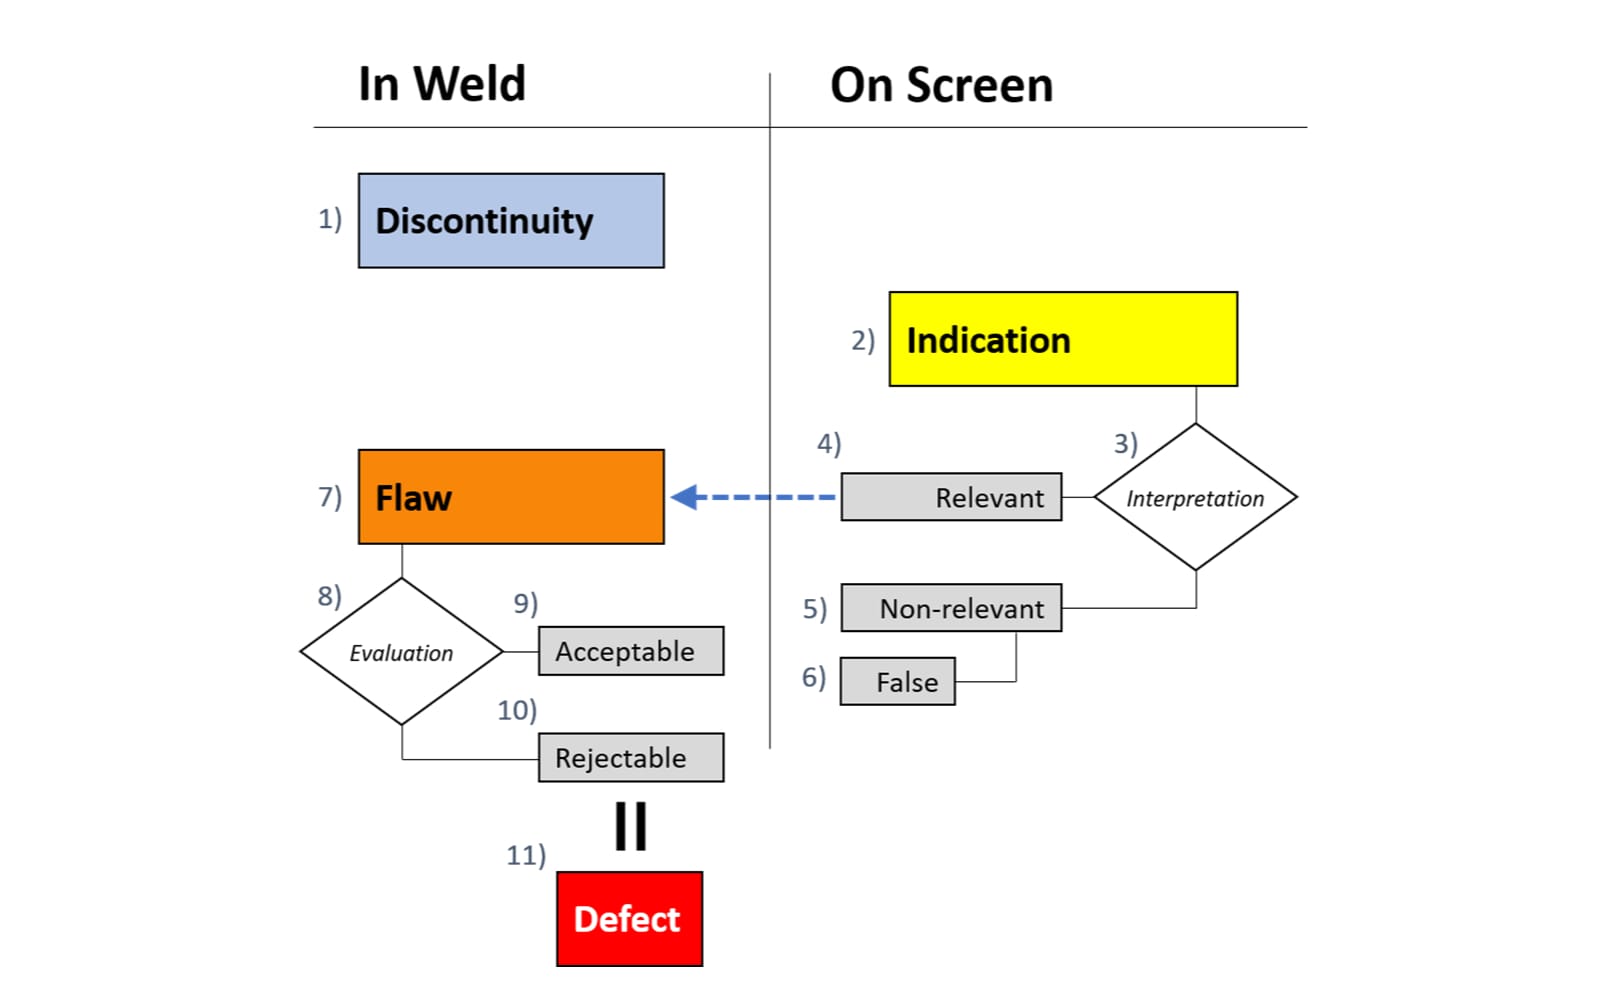
1) Discontinuity
♫ “One of these things is not like the other” ♫
Definition: a lack of continuity or cohesion; an intentional or unintentional interruption in the physical structure or configuration of a material or component
Example: root geometry, a flaw, or coarse grain structure in the weld body
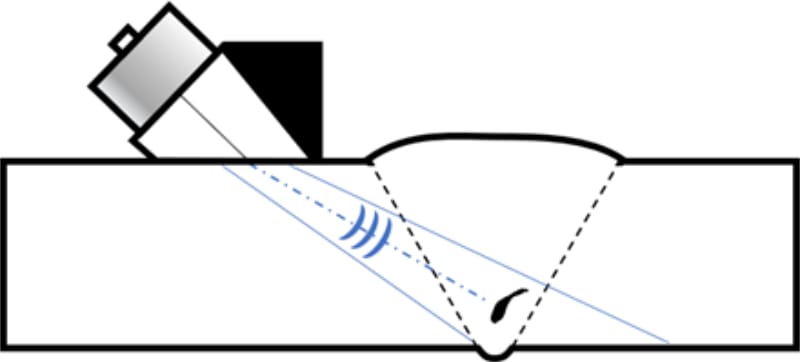
This is where it all starts. At this point we haven’t performed NDT on anything yet. Is it supposed to be there? Is it geometry? What is it? We have no clue, but if it produces an indication, then we can detect it and investigate it further.
2) Indication

Definition: the response or evidence from a non-destructive examination
Example: a blip on your A-scan (any blip) including grass and signals from normal weld geometry
Let’s push some sound down in there and get a signal. We’ve got an A-scan with some blips and wiggly lines, and now we’re getting somewhere!
3) Interpretation
Definition: the determination of whether indications are relevant or nonrelevant
Being able to tell the difference between relevant and non-relevant indications is the hardest part. This is where most mistakes are made, both false positives (calling something that isn't there) and false negatives (you missed something). Easy way to remember: interpretation is performed on indications (both start with "I").
4) Relevant Indication
Definition: an NDT indication that is caused by a condition or type of discontinuity that requires evaluation
Example: a blip on the A-scan that behaves like something you might care to take another look at, like a suspected slag inclusion on the hot pass.
If one of those blips on the A-scan looks like it might be important, then it’s relevant. And if it’s relevant, then we consider the source of the indication a "flaw" (see #7).
5) Non-Relevant Indication
Definition: an NDT indication that is caused by a condition or type of discontinuity that is not rejectable. False indications are non-relevant.
Example: a blip the A-scan that behaves like something we don’t care about, like indications from normal root geometry.
6) False Indication
Definition: an NDT indication that is interpreted to be caused by a condition other than a discontinuity or imperfection
Even though our little friend here gets its own section, a false indication is just a type of a non-relevant indication caused by something not in the weld like regular signal noise or internal wedge reflections.
7) Flaw
Definition: an imperfection or discontinuity that may be detectable by non-destructive testing and is not necessarily rejectable
This is the source of a relevant indication. The flaw is the thing in the part (left side of the flowchart) that makes a relevant indication (right side of the flowchart). If it weren't a flaw, it wouldn't be relevant.
8) Evaluation
Definition: determination of whether a relevant indication is cause to accept or to reject a material or component.
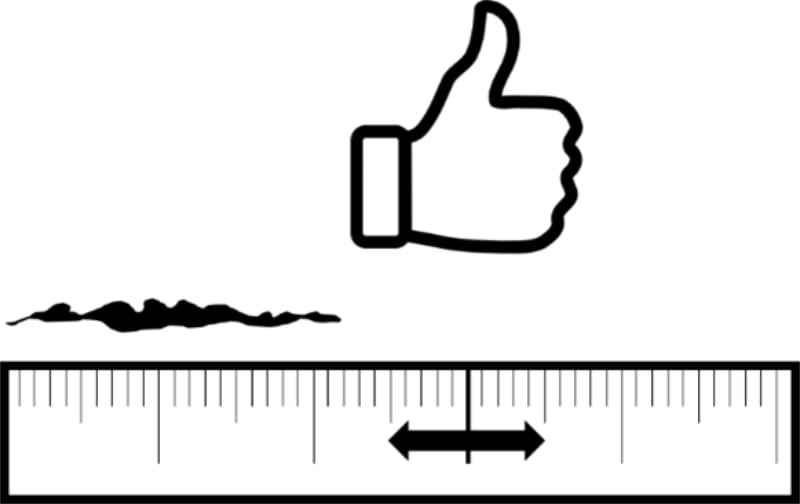
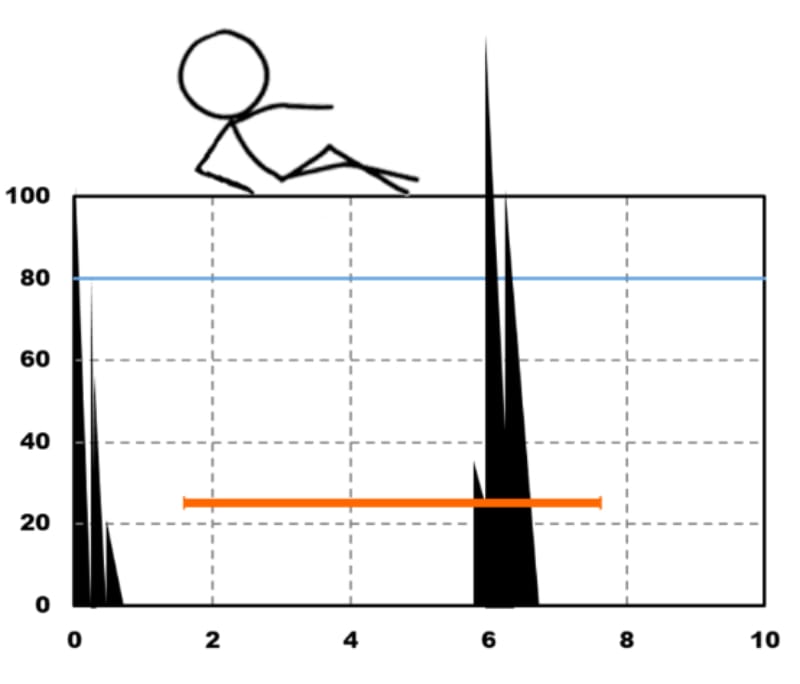
Evaluation may be as simple as comparing the indication amplitude to a maximum allowable limit, or may be complex and involve measuring the depth, height, length and type of flaw. Evaluation is performed on flaws ("E" comes before "F"... sorry, that's the best I have!).
Aside: the first sentence in the paragraph above suggests that you would evaluate an indication... which is exactly the opposite of what I just told you (we evaluate flaws, not indications). <sigh> Amplitude-based techniques assume that the amplitude is proportional to the size or severity of the flaw. Lots of points of contention with that assumption (a whole other article), but for now just go with it. When we evaluate the signal amplitude, we're actually assuming it's related to the flaw size. So we're using signal amplitude as a proxy for flaw size.
9) Acceptable Flaw
Definition: (ASTM doesn't have one, I guess it's pretty self-explanatory!)
Example: it's a flaw that doesn’t fail your acceptance criteria. Your procedure might still ask you to report it though.
10) Rejectable Flaw
Definition: one or more flaws whose aggregate size, shape, orientation, location, or properties do not meet specified acceptance criteria and are rejectable
Example: stuff that fails your acceptance criteria (too long, too loud, crack-like, etc.)
A rejectable flaw is a defect.
11) Defect
> GOTO 10
> READY
Conclusion
And that's it. Using the right terminology isn't hard, it just takes a little discipline.
While writing this article I spent most of my time on page 2 of ASTM E1316. It wasn't until just as I was finishing when I slipped back to page 1. Lo and behold, there was a simpler flowchart right there staring me in the face... mocking me for wasting all my time while an even more concise visual was right under my nose. But I persevered and finished it off anyways, falling victim to the sunk cost fallacy. Oh well. My article has more pictures.
Please contact our Applications Team if you have any questions. You can also find more solutions on our website.
Stay up to date with our latest content. Sign up here to get our blogs delivered straight to your inbox.
News Filter...

The latest news from Sonatest direct to your inbox.
Tags


