- Blog
Ultrasonic Inspection of Pipeline Seam and Helical Butt Welds

29th July 2024
Sam Hughes, Sonatest
This Blog details the challenges faced when inspecting seam and spiral/Helical welds on pipework and the ultrasonic solutions available to overcome those challenges and provide high-quality results.
Pipelines come in multiple configurations dependent on their intended service, which can be defined as the following:
- Seamless pipe
- Welded pipe
- Seam welded pipe
- Spiral / Helical welded pipe
Welded pipes are often cheaper to manufacture than seamless pipes and are used in lower-pressure, less corrosive environments than seamless piping. This type of pipe is also considered to have a higher risk of failure due to the potential weak points created by the welds. Because of this higher risk, these welds are inspected before going into service and can be assessed repeatedly during their service life to identify welding defects and in-service defects.
In this blog, we will describe the ultrasonic methods available for the inspection of welded pipes.
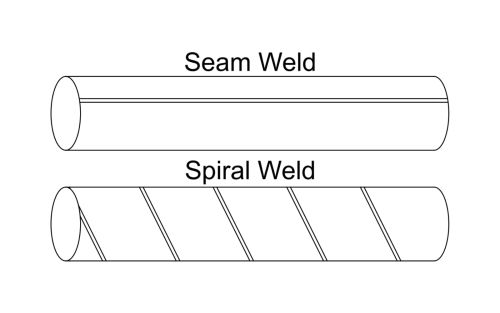
Fig. 1 - Examples of seam and spiral / helical welded pipe
Inspection Methods
Multiple inspection methods are available to assess pipeline seam welds; these include surface methods, such as Visual, Magnetic Particle, Dye Penetrant and Eddy Current inspections; these only inform the inspector of the condition of the surface and slight subsurface of the weld. Full volumetric inspections require ultrasonic methods (UT) or radiography (RAD).
UT has many advantages over RAD, the main ones being:
- UT produces no radiation hazards and can be carried out alongside other personnel; this is a safer process than radiography and means that the site does not need to be cleared of workers for the inspection to take place.
- UT is sensitive to minor defects, cracking defects and planar lack of fusion defects, making it an excellent application for thinner pipework but is also applicable for thicker materials.
- UT provides additional dimensional information for detected defects, through wall height and depth are easier to ascertain than when using RAD. Radiography can give this information using the parallax technique, but this requires multiple shots from different angles, which is not always possible and means more radiation is used, and use of a calculation.

Fig. 2 - Ultrasonic inspection of butt welds on pipe sections
Inspection Challenges of Seam and Spiral/Helical Butt Welds
The most common issues found when inspecting seam and spiral welds are the geometry of the test surface and the inside diameter (ID) geometry. This poses two key issues.
- Adequate contact to the surface is necessary to provide a good transfer of sound into the material.
- ID curvature reflects the signal differently than if the ID was flat; for a phased array, this can mean that every beam in a focal law may be refracted at a different angle, causing defect signals to be plotted incorrectly and actual sensitivity at the weld to be less than expected.
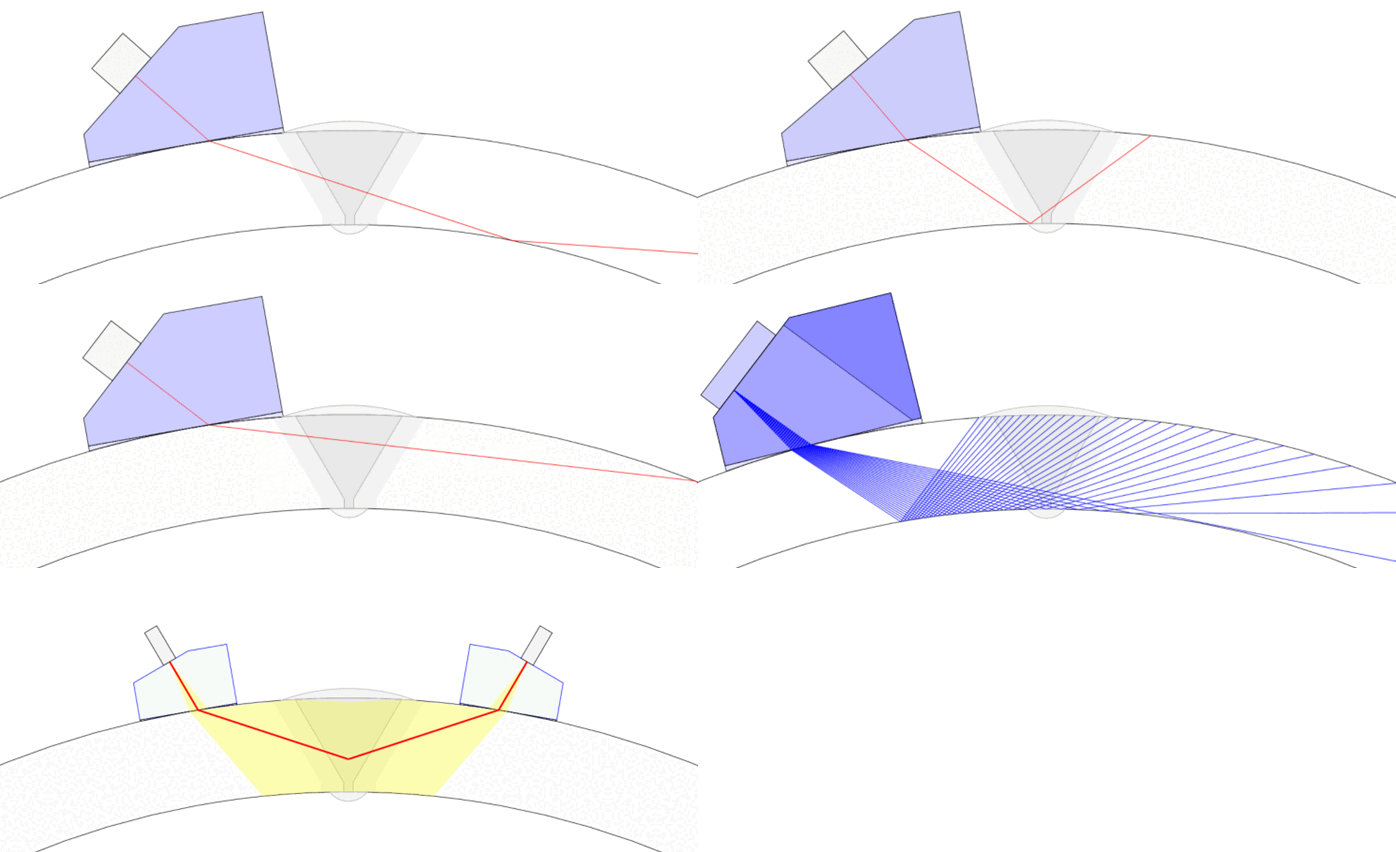
Fig. 3 - Conventional UT, Phased Array and TOFD setups on a seam weld.
Types of Ultrasonic Inspections
Conventional Ultrasonic Inspection (UT)
UT uses single or dual crystal transducers in single-beam configurations to interrogate a weld. Transducers are set to produce specific known angles in the material (usually 0°, 45°, 60° and 70°, but other angles can be used). Manual ‘scanning’ or movement of the transducer on the surface ensures coverage of the weld. Return signals are interpreted by the inspector to detect and size defects.
See our Butt Weld Inspection application note (pdf, 2.4mb) for further details.
Phased Array Inspection Using Curved Surface Correction (CSC)
A PA (Phased Array) inspection uses a transducer containing multiple individual elements in an array. These elements are pulsed individually or in groups to create a beam that can be directed and focused depending on the requirements of the inspection. PA inspection can inspect full weld volumes in a single sweep or interrogate specific areas of a weld and produce a recorded data file with views that can be manipulated to aid interpretation.
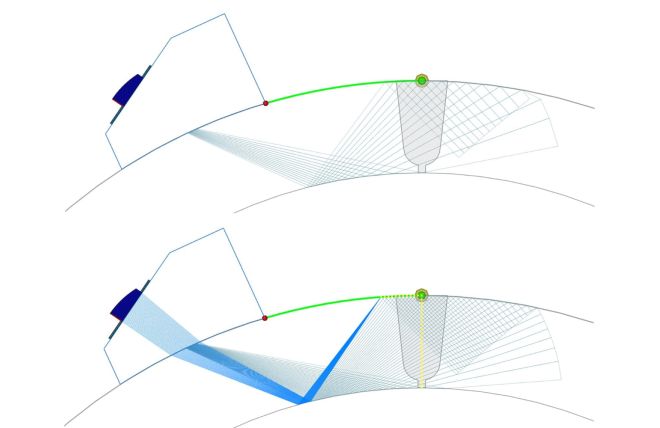
For seam welds, the curved ID surface can spread out the beams and cause lower-than-expected sensitivity at the weld than in a flat plate. Sonatest corrects this issue with Curved Surface Correction (SCS) mode; this ensures the S-Scan view is corrected for curved surfaces and plots indications correctly to avoid poor positioning or false calls.
See our PAUT Butt Weld Inspection application note (pdf, 2.8mb) and check out our Seam Weld Inspection technical paper for more information.
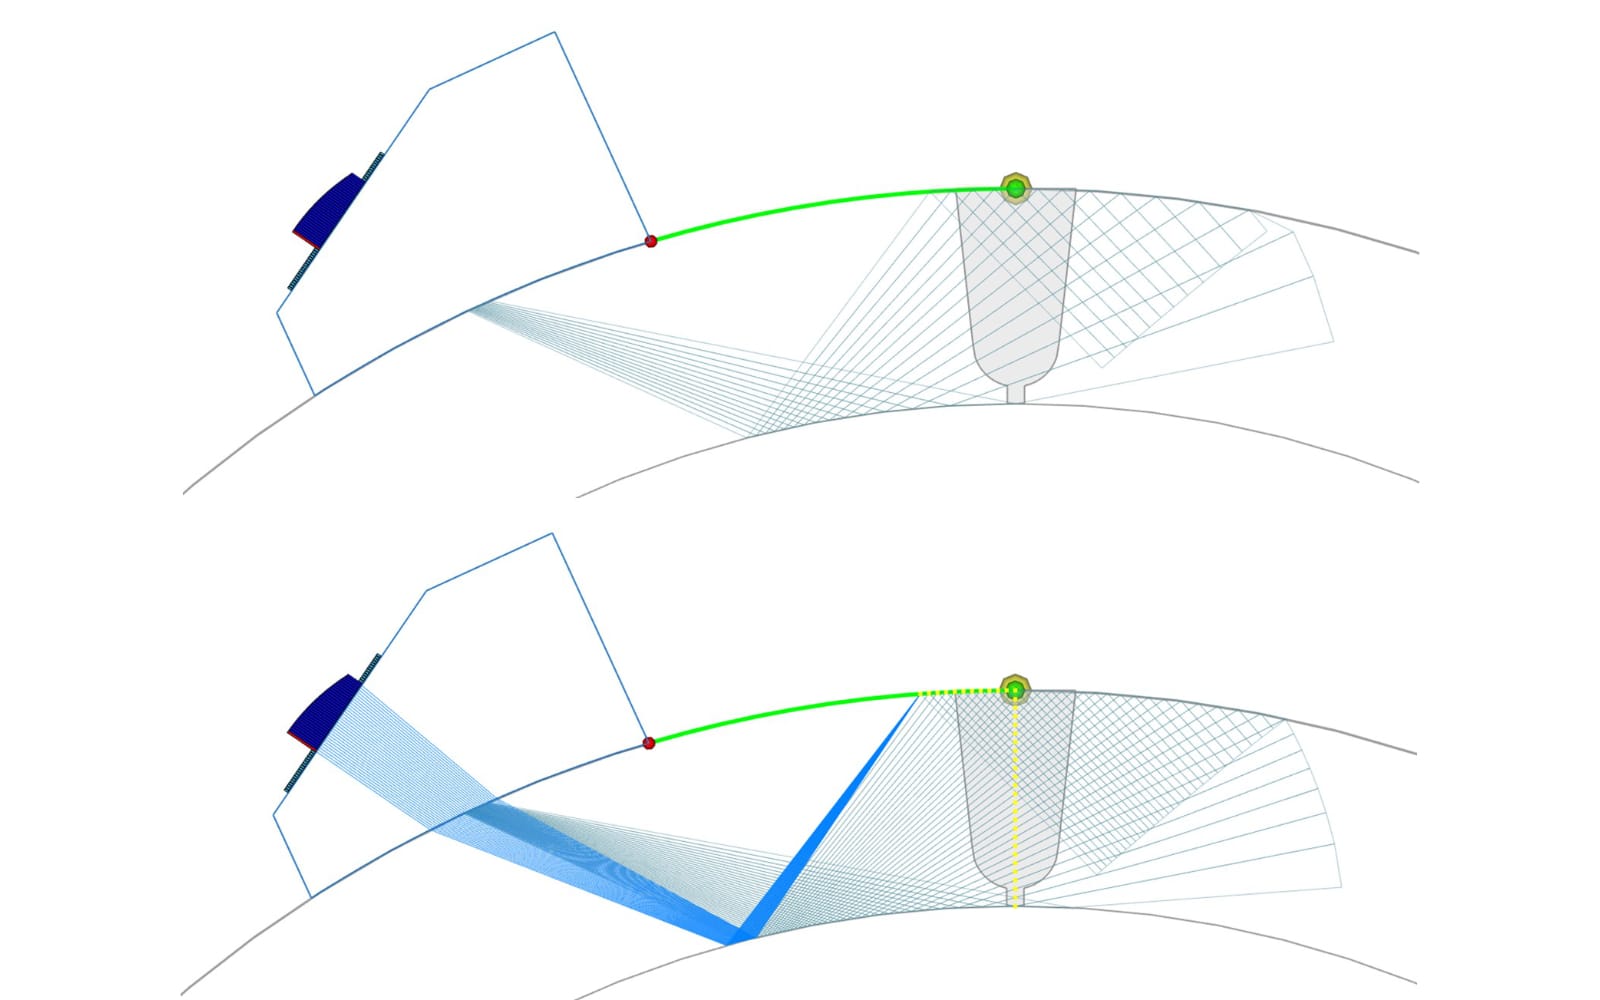
Fig. 4 - Showing the spread of the beam spacing (top) and the corrected scan with CSC Constant resolution focusing applied (bottom)
Time of Flight Diffraction (TOFD)
TOFD utilizes two transducers set apart and facing each other in a ‘pitch-catch’ formation. One transducer sends a pulse into the material, and the other transducer receives it. Instead of using reflections from defects and displaying results as depth of reflection or beam path, TOFD detects ‘tip diffraction signals’, which are much weaker and display results in time of flight. This gives a technique that has a high accuracy to defect depth and through wall height and is often used in the calculations for fracture mechanics.
See our TOFD Inspection of Butt Welds application note (pdf, 2.8mb) where TOFD is used for pipeline welds inspection.
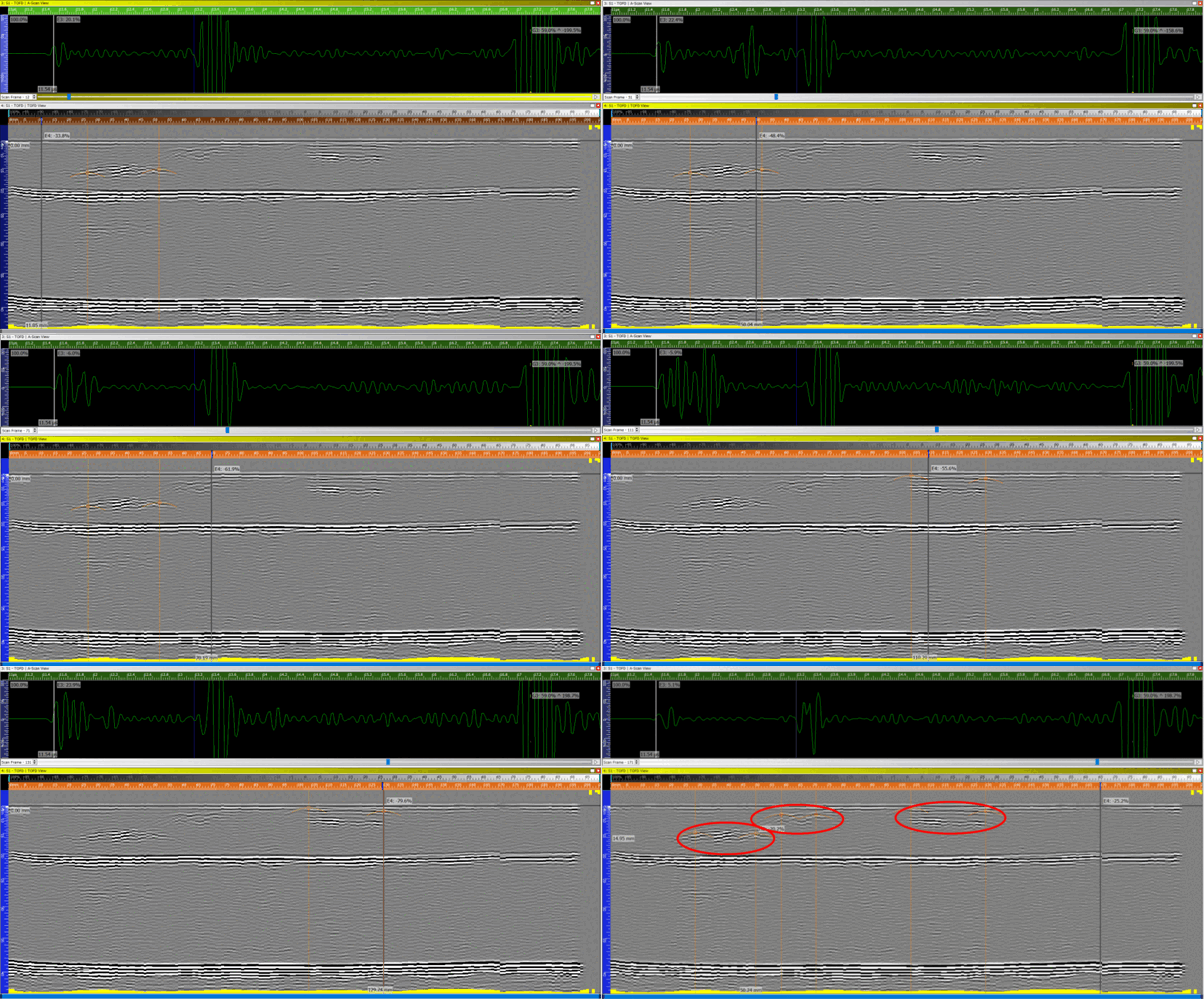
Fig. 5 - ToFD scan showing defect signals
Conclusion
We have presented 3 reliable techniques for seam weld inspections. They all provide excellent coverage of the target weld and HAZ, with tools to help the ease of inspection and data review. Each technique has pros and cons over each other and more comprehensive NDT method options. However, the safety improvements and high level of data quality compared to other techniques mean that UT is becoming the method of choice for more projects every year. If you think those techniques can improve your daily inspections, please get in touch with our Sonatest team below.
Please contact our Applications Team if you have any questions. You can also find more solutions on our website.
Stay up to date with our latest content. Sign up here to get our blogs delivered straight to your inbox.
News Filter...
The latest news from Sonatest direct to your inbox.
Tags
